STEP 1 | Launching the Android SIP Client | ||||||||||
To open the Android SIP Client begin by tapping on the Phone icon in your app drawer.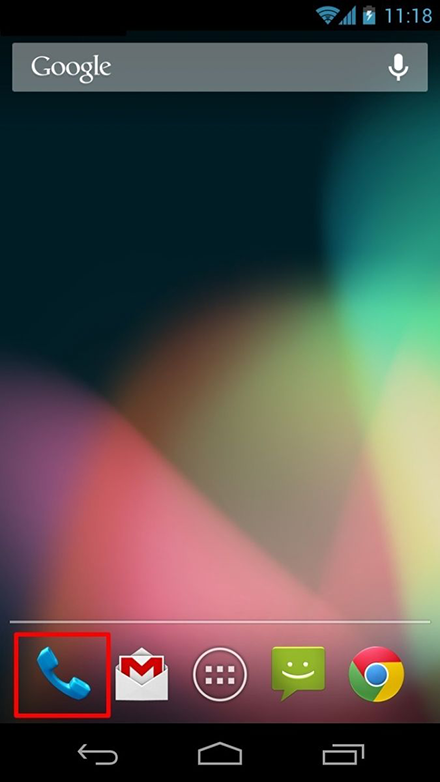 | |||||||||||
| STEP 2 | Navigate to the SIP account details screen | ||||||||||
Bring up the Settings menu by tapping on the three dots.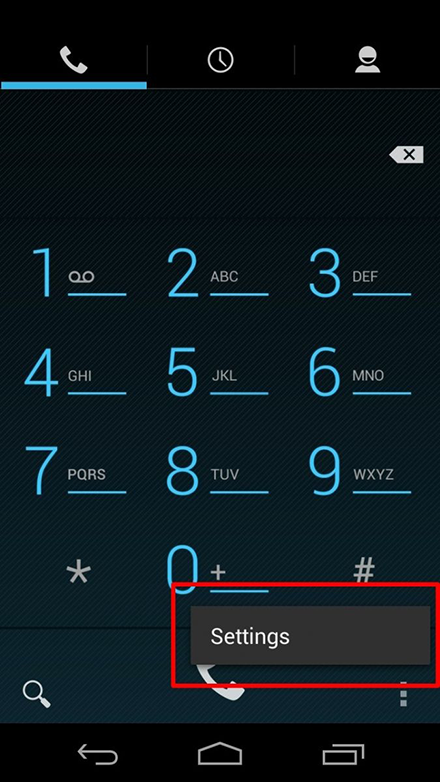 On the Call Settings page scroll down to the Accounts option and tap on it. 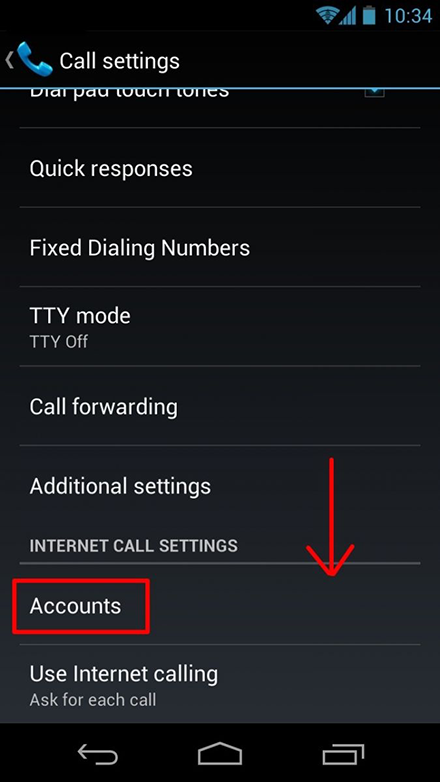 From the Internet calling (SIP) accounts screen, tap on Add Account near the bottom. 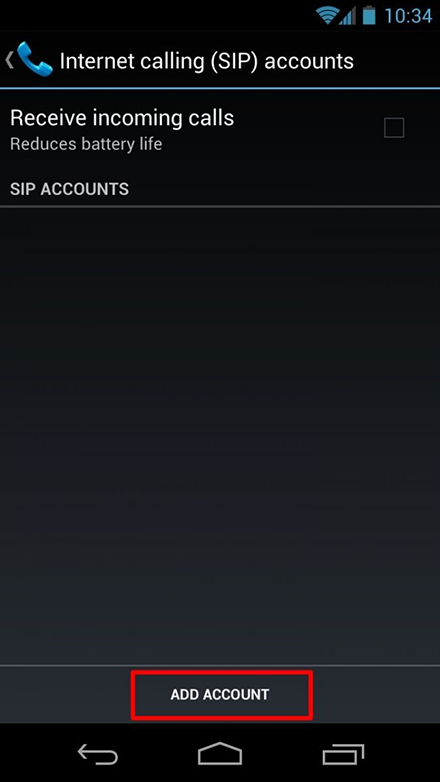 | |||||||||||
| STEP 3 | Configuring your Callcentric account | ||||||||||
We will now create a profile and enter the required credentials, such as your Callcentric number, password and SIP server on the SIP account details screen: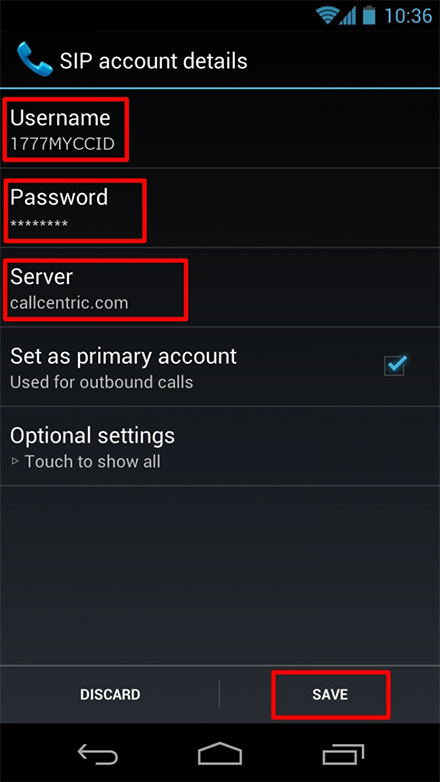
Tap Save after you have entered the above information. Your configuration should look similar to the one shown in the picture below: 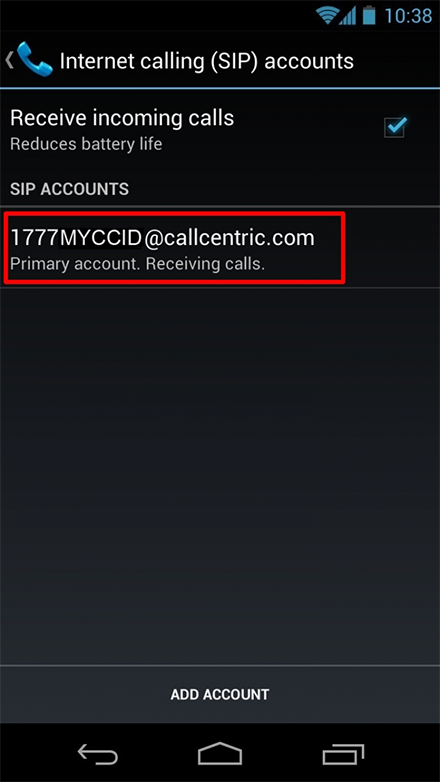 | |||||||||||
| STEP 3 | That's it! You can now make a phone call. | ||||||||||
| You can make a test call to 17771234567, or if you are signed up for one of Callcentric's rate plans you can place a call to a traditional landline or mobile phone by dialing either: 1 + the area code and number for calls to the US 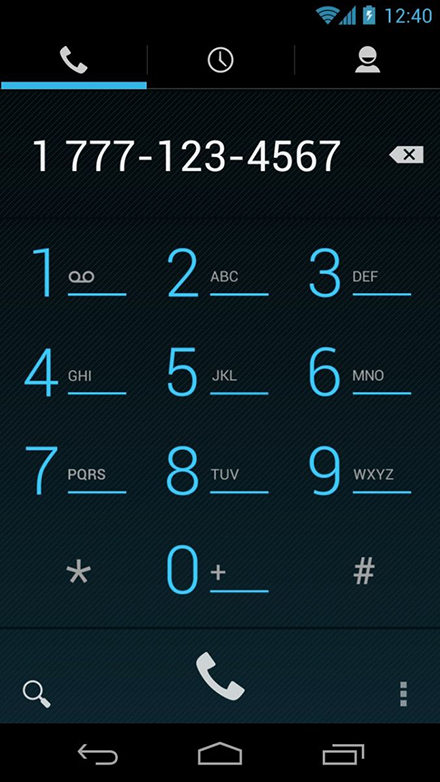 Or 011 + the country code, area code, and number for calls worldwide (you may also use 00 instead of 011). |
Thursday, 15 December 2016
How we launch android SIP client (3 Steps)
Subscribe to:
Post Comments (Atom)
No comments:
Post a Comment